

Table of contents
Update 28/10/2020
The Checkly Terraform Provider is now listed on the official Terraform Registry! We have updated the article to reflect the most recent changes.
In this guest article John Arundel, consultant and author of Cloud Native DevOps with Kubernetes, introduces the Checkly Terraform provider. He explains what Terraform is and why you'd want to use it, and shows how to use Terraform to automate and manage your synthetic monitoring with Checkly.
What is Terraform?
For small sites, it's perfectly possible to manage all your infrastructure and cloud resources directly, using your cloud provider's web interface. For example, you can create and update Checkly checks by hand using the Checkly web app.
As you start to scale up, though, this gets a bit more difficult:
- You may have multiple checks for your API endpoints
- You may have more checks for your browser click flows
- You'll need to keep these up to date and manage them as a team
Also, when you launch a new feature, you'll need to make sure you enable the new checks at exactly the right time. If changes don't work out, it would be convenient to roll back to the previous configuration, or see the history of changes you and your team have made to the configuration over time.
This is where a tool like Terraform comes in. Terraform helps you build, modify, and manage your infrastructure safely and efficiently. You can describe your desired configuration in a simple text file, which can be stored and versioned alongside your application code. The Terraform tool will deploy this configuration for you and take care of rolling out any changes that you need to make. You can even automate this process as part of your CI/CD pipeline; no mousing or typing necessary.
To read about how the Checkly team uses Terraform internally to manage its own infrastructure, see Tim's recent blog post on Zero Downtime deployments with Terraform.
More or less any kind of resource can be managed using Terraform, using what's called a provider. A provider is an integration library which tells Terraform about a particular kind of resource, such as a Checkly check, and connects Terraform to the necessary API to provision that resource for you.
In this tutorial, we'll see how to use the Checkly Terraform provider to create and update a simple check.
Installing Terraform and the Checkly provider
First, if you don't already have Terraform installed, follow the instructions for your particular system.
Since the Checkly Terraform Provider is now available officially from the Terraform Registry, it will be installed automatically when specified in your main.tf. Just follow the instructions below and you will be good to go.
Configuring your API key
To create a check with Terraform, you'll need two things:
First, you need a Checkly account, so if you haven't already, sign up for a free trial.
Second, you'll need an API key. This is a token that Terraform can send to the Checkly API to prove that you're you. Go to your Account Settings: API Keys page and click 'Create API Key'. Copy the key and store it somewhere safe.
A good way to pass the API key to Terraform is to set it in your shell environment. For example, if your API key is XXX, you can run:
export TF_VAR_checkly_api_key=XXX
Now when you use Terraform commands, the API key will be available to the provider. If you're running Terraform automatically, using a CI/CD tool, follow the instructions for your tool on how to set environment variables for build jobs.
Creating your first API monitor
Let's create a new directory to hold our Checkly Terraform code. This could be part of the Git repository for your application or website, for example, or you could create a new repo just for Checkly.
mkdir checkly
cd checkly
Create a file named main.tf with the following contents:
variable "checkly_api_key" {}

terraform {
  required_providers {
    checkly = {
      source = "checkly/checkly"
      version = "0.7.1"
    }
  }
}

provider "checkly" {
  api_key = var.checkly_api_key
}

resource "checkly_check" "checkly-public-stats" {
  name                      = "public-stats"
  type                      = "API"
  activated                 = true
  should_fail               = false
  frequency                 = 1
  double_check              = true
  ssl_check                 = true
  use_global_alert_settings = true

  locations = [
    "us-west-1"
  ]

  request {
    url              = "https://api.checklyhq.com/public-stats"
    follow_redirects = true
    assertion {
      source     = "STATUS_CODE"
      comparison = "EQUALS"
      target     = "200"
    }
  }
}
You can see that the API monitoring parameters of the check set out in this code are the same ones you'd set using the Checkly web interface:
- The URL to check
- The locations to check from
- Whether to follow redirects
- Any assertions about the results
- ...and so on.
Although there are more things you can configure if you want to (see the Checkly API documentation), this should be enough to get you started.
First, we'll need to initialize the Terraform 'workspace' — this ensures that Terraform has all the providers your code requires, and that they're correctly set up.
Initializing Terraform
In your checkly directory, and with your TF_VAR_checkly_api_key variable set, run this command:
terraform init

Initializing provider plugins...

Terraform has been successfully initialized!

You may now begin working with Terraform. Try running "terraform plan" to see
any changes that are required for your infrastructure. All Terraform commands
should now work.

If you ever set or change modules or backend configuration for Terraform,
rerun this command to reinitialize your working directory. If you forget, other
commands will detect it and remind you to do so if necessary.
If you see errors at this stage (for example, missing the checkly provider), check the provider documentation to make sure it's installed correctly.
Assuming terraform init was successful, we're ready to apply the Checkly configuration.
Creating a plan file
It's a good idea whenever you're using Terraform to do a 'dry-run' first; this shows you what changes Terraform would make if you applied this configuration, without actually doing anything.
terraform plan -out tf.plan
var.checkly_api_key
  Enter a value: ************************************

Refreshing Terraform state in-memory prior to plan...
The refreshed state will be used to calculate this plan, but will not be
persisted to local or remote state storage.


------------------------------------------------------------------------

An execution plan has been generated and is shown below.
Resource actions are indicated with the following symbols:
  + create

Terraform will perform the following actions:

  # checkly_check.checkly-public-stats will be created
  + resource "checkly_check" "checkly-public-stats" {
      + activated                 = true
      + degraded_response_time    = 15000
      + double_check              = true
      + frequency                 = 1
      + id                        = (known after apply)
      + locations                 = [
          + "us-west-1",
        ]
      + max_response_time         = 30000
      + name                      = "public-stats"
      + should_fail               = false
      + ssl_check                 = true
      + type                      = "API"
      + use_global_alert_settings = true

      + alert_settings {
          + escalation_type = (known after apply)

          + reminders {
              + amount   = (known after apply)
              + interval = (known after apply)
            }

          + run_based_escalation {
              + failed_run_threshold = (known after apply)
            }

          + ssl_certificates {
              + alert_threshold = (known after apply)
              + enabled         = (known after apply)
            }

          + time_based_escalation {
              + minutes_failing_threshold = (known after apply)
            }
        }

      + request {
          + body_type        = "NONE"
          + follow_redirects = true
          + headers          = (known after apply)
          + method           = "GET"
          + query_parameters = (known after apply)
          + url              = "https://api.checklyhq.com/public-stats"

          + assertion {
              + comparison = "EQUALS"
              + source     = "STATUS_CODE"
              + target     = "200"
            }

          + basic_auth {
              + password = (known after apply)
              + username = (known after apply)
            }
        }
    }

Plan: 1 to add, 0 to change, 0 to destroy.

------------------------------------------------------------------------

This plan was saved to: tf.plan

To perform exactly these actions, run the following command to apply:
    terraform apply "tf.plan"
Don't worry about all the details of this output for now. Essentially, Terraform is telling us that applying this plan would create a Checkly API check named checkly-public-stats, with the configuration shown. The plan summary at the end shows that one new resource would be created (1 to add), no existing resources would be changed, and none would be deleted (0 to change, 0 to destroy). That's what we expected, so that's fine.
The 'plan' is the set of changes that Terraform would make, and this is saved to disk as the file tf.plan. You don't need to edit this or check it in to version control; it just contains the compiled plan in a binary format, and we can dispose of it after the plan has been applied.
If you see errors at this stage, check that your API key is correctly set in your environment, as described in the 'Configuring your API key' section above.
Applying the plan
Now we can go ahead and apply the generated plan with terraform apply tf.plan
terraform apply tf.plan
checkly_check.checkly-public-stats: Creating...
checkly_check.checkly-public-stats: Creation complete after 1s [id=8389b9bc-a6c9-4f97-8e91-e35e0ea2e5fc]
Apply complete! Resources: 1 added, 0 changed, 0 destroyed.
The state of your infrastructure has been saved to the path
below. This state is required to modify and destroy your
infrastructure, so keep it safe. To inspect the complete state
use the `terraform show` command.
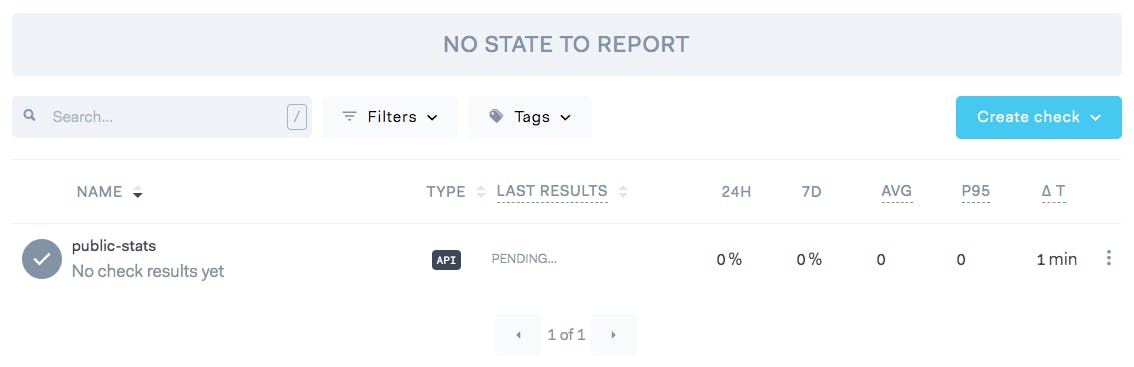
State path: terraform.tfstateThere were no errors from the terraform apply command, so if all is well our new check should have been created. Let's check the web interface to see:
If we edit this check, we can see that the parameters are all as specified in the Terraform code:

Everything looks good, so we can tidy up the plan file:
rm tf.planWe can now check our code into version control and enjoy our freshly-automated infrastructure.
Making changes with Terraform
We've seen how to create a new check from scratch, but what if we wanted to just change the parameters of an existing check? For example, we might want to add some more locations to the check. How can we do that using Terraform?
Essentially, all we need to do is make the required changes to our main.tf file, and then follow the same plan-and-apply process that we used to create the check in the first place.
Edit the main.tf file and make this change:
  ...
  locations = [
    "us-west-1",
    "eu-west-2",
    "ap-northeast-1"
  ]
  ...
We don't need to re-initialize Terraform, so we can go ahead and generate the plan:
terraform plan -out tf.plan
var.checkly_api_key
  Enter a value: *******************************

Refreshing Terraform state in-memory prior to plan...
The refreshed state will be used to calculate this plan, but will not be
persisted to local or remote state storage.

checkly_check.checkly-public-stats: Refreshing state... [id=8389b9bc-a6c9-4f97-8e91-e35e0ea2e5fc]

------------------------------------------------------------------------

An execution plan has been generated and is shown below.
Resource actions are indicated with the following symbols:
  ~ update in-place

Terraform will perform the following actions:

  # checkly_check.checkly-public-stats will be updated in-place
  ~ resource "checkly_check" "checkly-public-stats" {
  ...
      ~ locations                 = [
          + "ap-northeast-1",
          + "eu-west-2",
            "us-west-1",
        ]
  ...
Notice that the plan now says 0 to add, 1 to change, 0 to destroy. That makes sense, since there are no new checks to create, none need to be destroyed, and only one check needs to be changed.
Apply the plan with terraform apply tf.plan, and let's check the web interface to see that Terraform has made the necessary changes:

Our check has gone global! Well done. Next, you might like to try modifying the check to set the URL to your own website or API.
So what have we learned?
- We've installed Terraform and the Checkly provider.
- We've written the Terraform code for a simple check.
- Planned and applied it to create the check.
- Used Terraform to make a change to an existing check.
That's a great start! You now have everything you need to put your existing monitoring into Terraform code, and to create and modify new checks using Terraform.
Incidentally, there's no distinction between checks you create 'by hand' in the Checkly web interface, and those you create with Terraform. It's a good idea, though, if you're going to use Terraform with Checkly, to use it to manage all your synthetic monitoring. Otherwise there will be an awkward split between the things that are in your code, and those that only exist in the Checkly web interface.
Once you're managing all your checks with Terraform code, don't make any more manual changes using the web interface. Otherwise, the next time you apply the Terraform code, it will want to undo the manual changes, which probably isn't what you want. Stick to making changes with Terraform from now on.
Congratulations, you're up and running with Checkly and Terraform! Have fun.
banner image: detail from "Senju Waterfall". Kawase Hatsui, 1951, Japan. Source