

Table of contents
When I started Checkly, all the typical SaaS things around billing, credit cards and prorating confused the hell out of me. I understood them from an intellectual point of view, but not really from an implementation point of view.
Sure, I hooked up some payment providers (Adyen, Paypal) at previous jobs. But I was never in the position to really connect the dots between the software bits and the business bits. I was also never part of a "pure" SaaS player before Checkly.
Choosing a subscription billing provider
Writing a subscription billing backend yourself is of course nuts. That's why companies like Chargebee, Recurly, Chargify and others exist.
Funnily, what I didn't know before starting Checkly is that Stripe never had a recurring subscriptions product. They launched it in April 2018, right when I was just getting out of private beta. So I integrated Stripe Billing, because I thought it was the thing everyone did when they "integrated Stripe".
Our Stripe Billing setup
I'm not going to duplicate the Stripe Billing docs here, but I'll pick out some details that were not completely obvious to me when implementing this and required some iterations to get right.
First a primer on the core Stripe Billing entities:
- Products describe the plans you can subscribe to. Notice how products are very generic buckets. They are the canonical names you refer to when talking to customer. "Would you like one fresh Developer plan?". No cryptic names or back office only IDs.
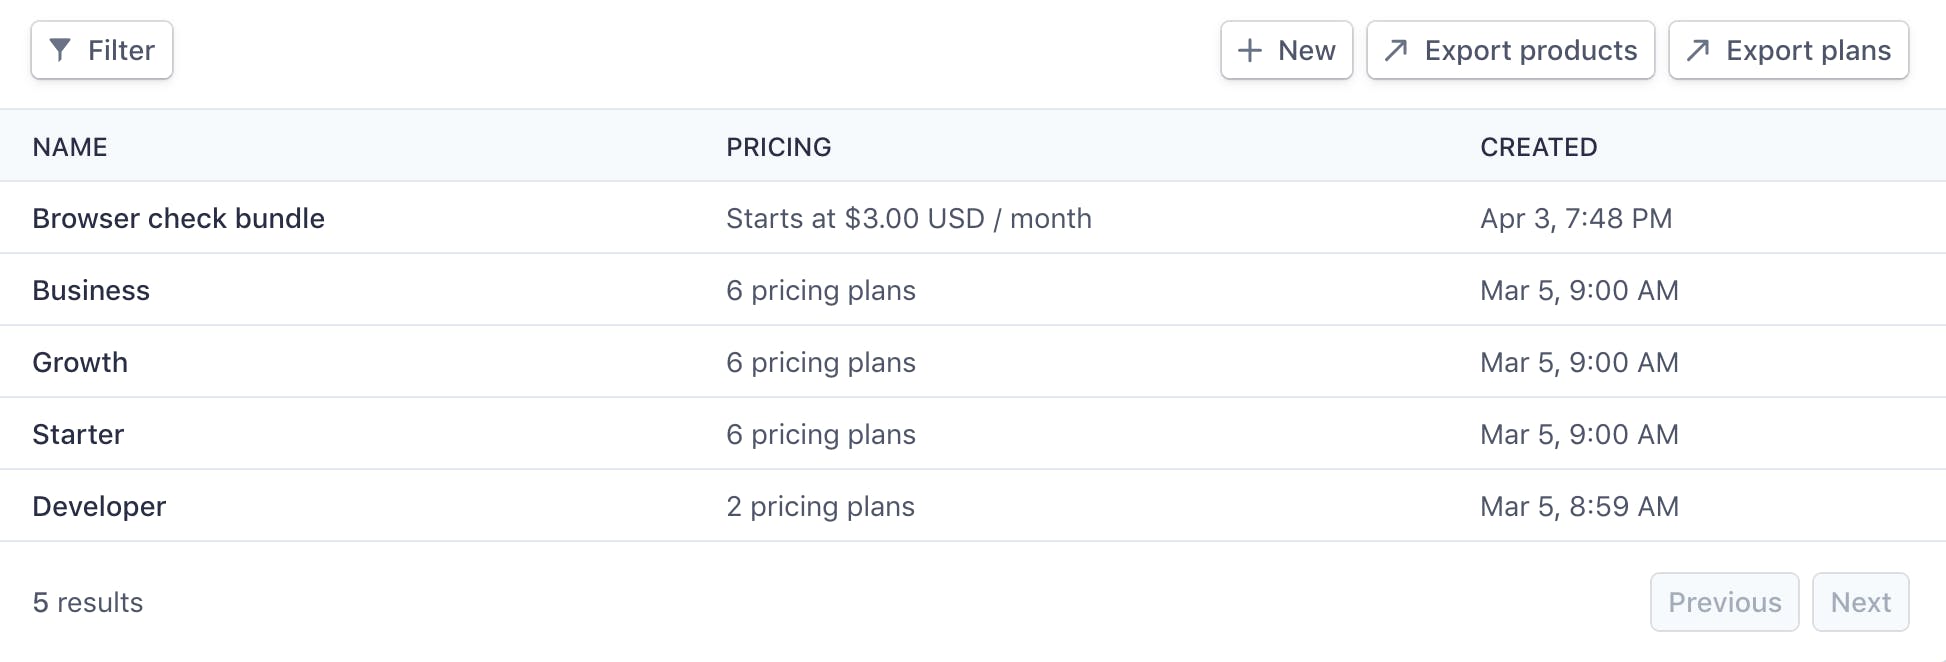
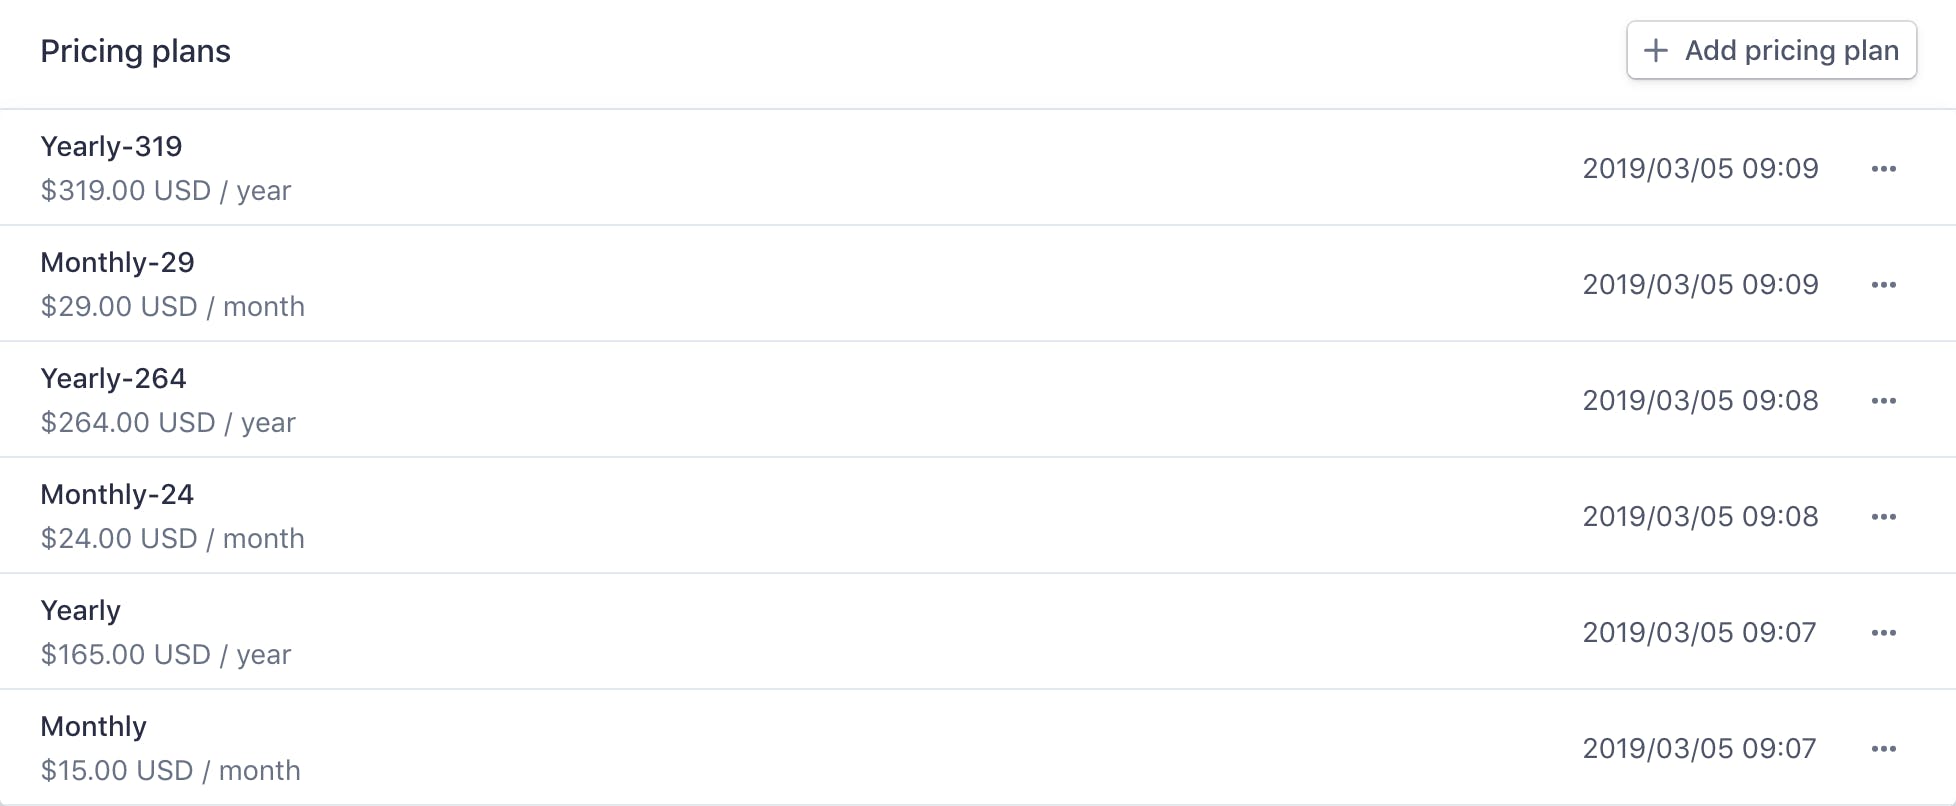
- Each product has pricing plans. These are the entities your users actually subscribe to. You can have multiple pricing plans, for example for the yearly and monthly subscription cycle.
Notice we have a <cycle>-<price> naming scheme going on and we have multiple Monthly and multiple Yearly entries. This is because we are changing and tweaking prices as Checkly matures. This way we can grandfather early customers into their pricing plan. So, with each change in pricing, you add a pricing plan instead of editing the one that's already there.
- Users have subscriptions to pricing plans. This determines what they are billed for each period. This entity has periods assigned to it, invoices, billing method etc. Basically all the active parts of the Stripe Billing system, whereas the other parts are mostly static configuration.
- You can also have tiered pricing and metered usage pricing. We are not using the metered usage pricing at this stage so I have no comment on it. However, we are starting with the tiered pricing. The "Browser Check Bundle" product in the above screenshot is an example.
Tiered pricing allows you to add extra whatever™ items to a pricing plan where the eventual price is based on the quantity added.
For Checkly, this was great when customers asked if they can get some extra browser checks above their plan limit, but without needing to upgrade to the next plan level. For example, our Starter plan gives you five browser checks, but you need eight. You don't want to opt for the Growth plan. No problem, we can add the overage of three to your plan using this bundle. Boom, sales 💵
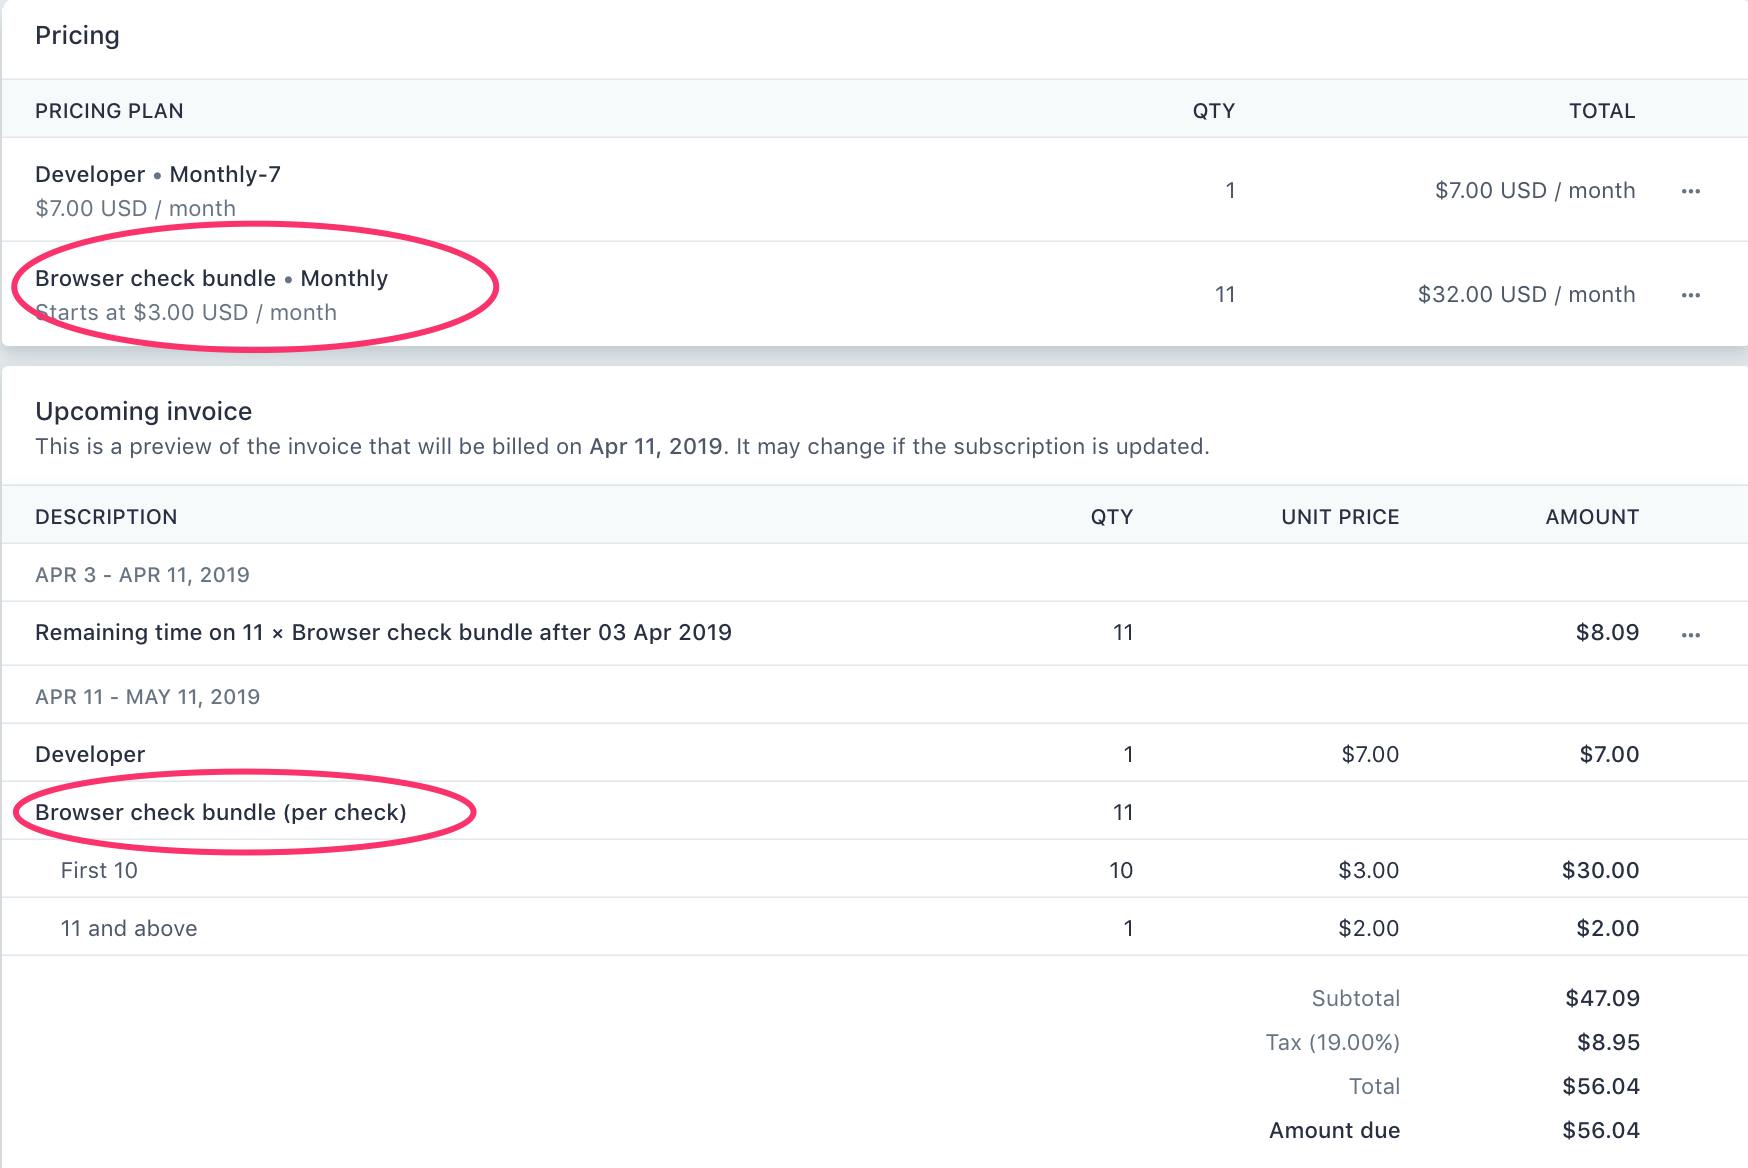
The tiering allows you to assign different unit prices per volume. This is commonly used to give discounts for higher volumes, i.e. the first ten are $3 per unit and from there on $2 per unit.
See the example below of a standard subscription with a tiered check bundle.
Hooking it up
Looks great, nice pictures. But how do you hook it up to your SaaS backend? Here's how we do it at Checkly. I'm going to explain it by going through a typical customer signup process.
1. Just browsing
A potential customer hits our landing page and checks out the pricing page. Nothing happens with Stripe. The pricing is hard coded. The shame. 😱
2. Trial
Our potential customer is convinced Checkly will change his/her life. A trial is started. Nothing happens with Stripe, although Stripe does have an option to mark a subscription with a trial period. I found no good use for it.
3. Paid plan
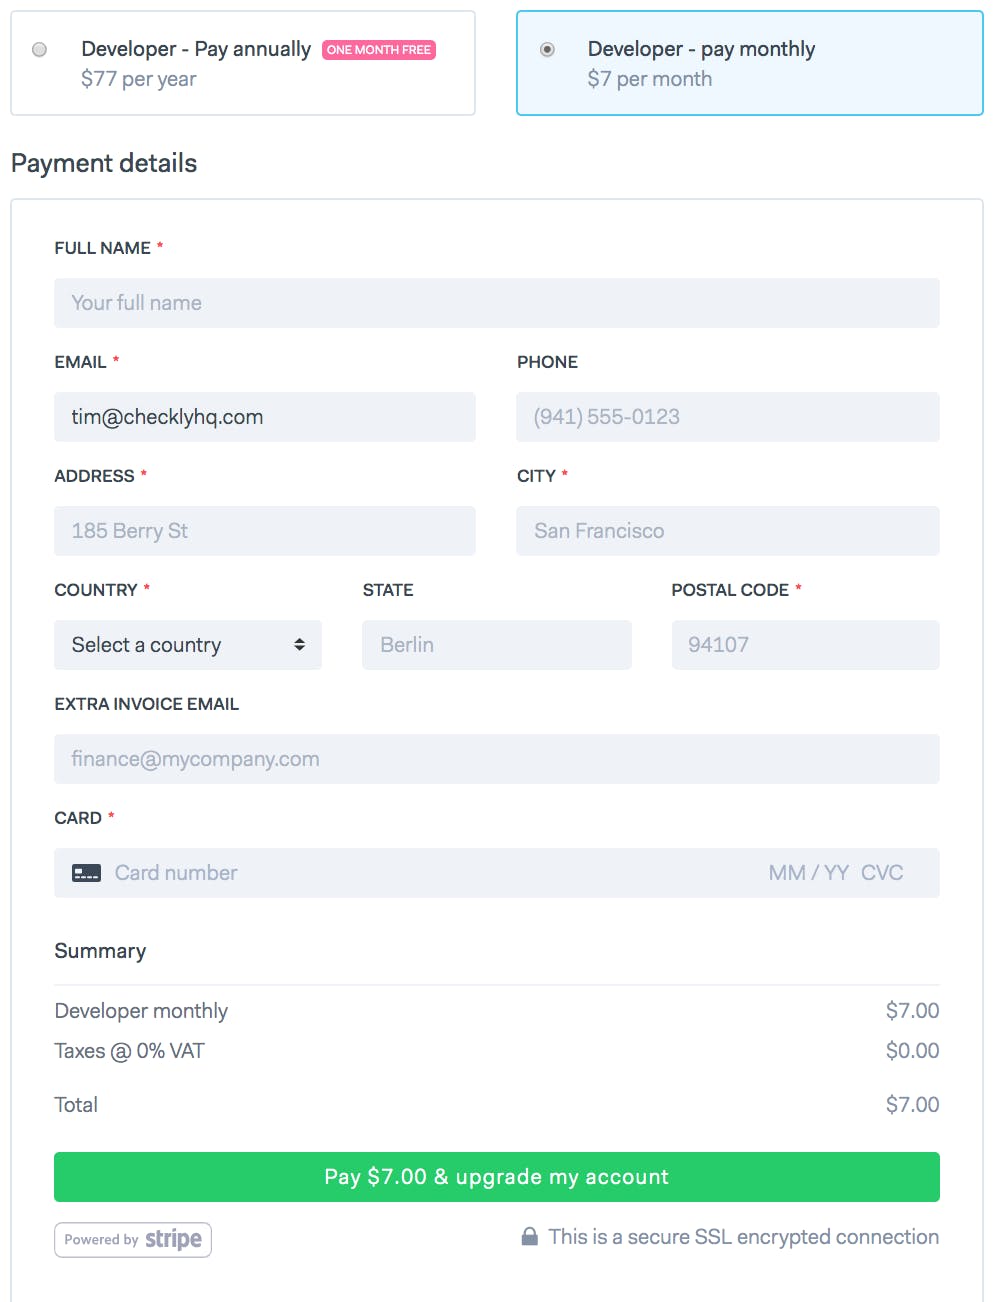
We're on! A user selects a paid plan and fills out the typical form for name, address, credit card details etc. Most of the implementation here is a custom Vue.js form, with the exception of the credit card field. This is actually an iframe directly hosted on Stripe's backend. Most of this is fairly well covered in the original docs.
The billing period selectors are still using hard coded pricing information in the frontend. Again, the shame. 😲
The user hits the submit button and an API cha cha cha begins between Checkly and Stripe.
What are the interesting bits here, without regurgitating the Stripe docs? Let's look at a slightly redacted version of the actual controller code from our Hapi.js based API.
  create (request, reply) {
    const { token, planName, interval, accountId, details } = request.payload
    let account = null
    let stripeSubscriptionId = null
    let plan = {}

    Promise.all([
      Account.query().findOne({ id: accountId }),
      Plan.query().findOne({ name: planName })])
      .then(res => {
        account = res[0]
        plan = res[1]
        stripeSubscriptionId = account.stripeSubscriptionId

        if (stripeSubscriptionId) {
          return _updateSubscription(accountId, stripeSubscriptionId, plan, interval, details)
        } else {
          return _createSubscription(accountId, token, plan, interval, details)
        }
      })
      .then(res => {
        reply(res)
      })
      .catch(err => {
        reply.badImplementation(err)
      })
  }
- We grab the payload data from the
POSTto our API endpoint. Thetokenis crucial as it is signed by Stripe directly from the browser. This functions somewhat like a one time password for linking the credit card details the user supplied to Stripe using the iframe.
TheplanNameandintervalare also crucial for obvious reasons. Let's assume in this case they are "Starter" and "Monthly". - We fire of two queries in parallel: One for the account, one for the plan.
If the account already has a subscription, we call a function to update the subscription. This allows users to upgrade or downgrade. Stripe handles all the finicky billing details with prorating. If the customer is brand new, we call a function to create a new subscription.
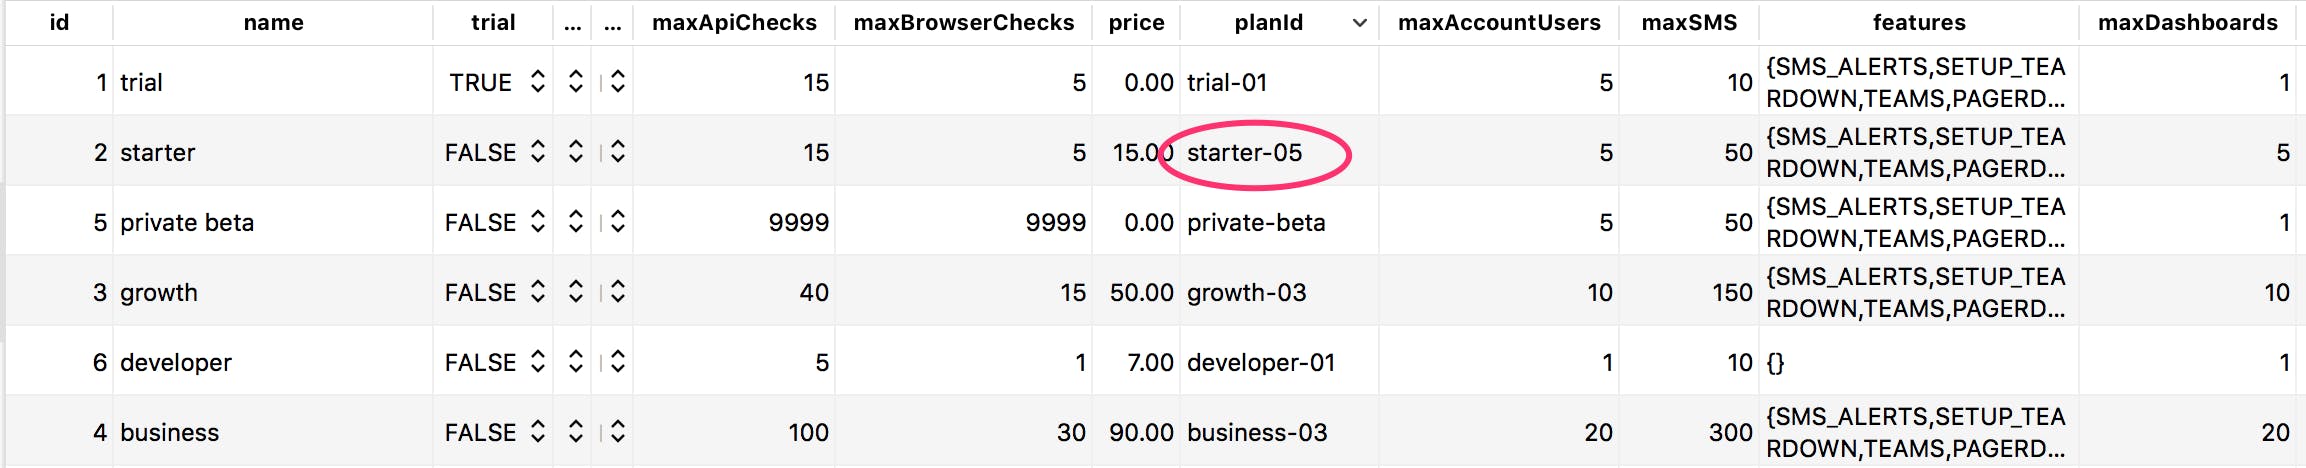
The plan query returns, among other things, a column that contains the pricing plan ID as it is registered in Stripe. Note we fetch the plan by its canonical name, i.e. "Starter" and we store the specific current pricing plan ID as a separate column in that row.

Let's look at the _createSubscription() function a bit closer.
function _createSubscription (accountId, token, plan, interval, details) {
  let customer = null

  return StripeService.createCustomer(token, details)
    .then(res => {
      customer = res
      return SalesTaxService.getSalesTax(details.country, details.vatNumber)
    })
    .then(tax => {
      const taxPercent = tax.rate * 100 || 0.00
      const stripepPlanId = toStripePlanId(plan.planId, interval)
      return StripeService.createSubscription(customer.id, stripePlanId, taxPercent)
    })
    .then(subscription => {
      return Account
        .query()
        .update({
          planId: plan.id,
          planInterval: interval,
          stripeCustomerId: customer.id,
          stripeSubscriptionId: subscription.id,
          maxApiChecks: plan.maxApiChecks,
          maxBrowserChecks: plan.maxBrowserChecks,
          maxSMS: plan.maxSMS,
          maxDashboards: plan.maxDashboards,
          features: plan.features,
          currentPeriodEnds: calculateCurrentPeriodEnds(interval)
        })
        .where({id: accountId})
    })
}
Lot's of interesting stuff happening here.
- We call a
createCustomer()method on our Stripe service. This is just a thin wrapper around the Stripe Node.js SDK. It returns a new customer. Yay 🎉 - We call a custom
SalesTaxServicewhich is another thin wrapper around the super excellent node-sales-tax package. I'll do a post on this some other time, suffice to say you don't really need a third party SaaS to do your sales tax. - After we know our sales tax, we call
createSubscription()which actually creates the subscription for our new customer.
ThetoStripePlanId()helper function has an important job here, as based on the interval passed in it appends the string-yearto the plan ID. This is how we distinguish between signing up a customer to the monthly or yearly version of a plan. - After the subscription is created, we copy over all the relevant plan details to the account record. Most important are the the plan volume limits and features. Also, we set the date when this plan expires in the
currentPeriodEndsfield. We use that all over the backend and frontend to show messages and determine if a user is allowed to do things or not. See the previous two posts on this blog.
The updateSubscription() function is just a minor variation on this theme.
The one webhook to rule them all
Ok, customer is hooked up, subscription created and first payment in the pocket. What happens next month (or year) when the subscription renews?
Stripe informs you of all things happening in their backend with webhooks. This is super common and not very interesting by itself.
What is interesting, is that you can probably scrape by in the beginning of your SaaS product by listening to just one webhook:
invoice.payment_succeeded
hallowed be thy name 🤘
The webhook is send out when the automatically generated Stripe Billing invoice has been connected with an actual, validated payment.
And yes, you will need to listen to more webhooks later down the road (I think) and this is really basic, but it works really well for a ton of things. Here's what our code looks like for the API endpoint we direct all Stripe webhooks to.
  hooks (request, reply) {
    const signature = request.headers['stripe-signature']
    const event = StripeService.getEvent(request.payload, signature)
    switch (event.type) {
      case 'invoice.payment_succeeded':
        _updateAccountOnPayment(event)
          .then(() => { return _doInvoicingStuff(event) })
          .then(() => { reply() })
          .catch(err => { reply.badImplementation(err) })
        break
      default:
        console.log(`no action for Stripe event ${event.type}`)
        return reply()
    }
  }
- We catch all webhook messages and validate them using the standard signature validation Stripe recommends. This makes sure the message actually came from Stripe.
- We have a typical case
switchstatement and only act on the holyinvoice.payment_succeededevent type. - The
_updateAccountOnPayment()function is so simple I'm not going to show the code. Essentially it just bumps thecurrentPeriodEndsfield for the account. This now functions as a safeguard for all kinds of billing problems like cancelling customers, failing credit cards etc. There are corner cases of course, but you can deal with them by hand. This takes care of 98% of your normal billing cycle. - The
_doInvoicingStuff()method is something for another blog post, but it creates, updates and sends the correct invoices from our Moneybird accounting system. For Dutchies only. Gezellig 🇳🇱 🧀
banner image: Yoshitora (active 1850-1880), "Money Shower", Japan, source